
VIDEO: How to onboard and monetise exhibitors
Smooth onboarding of your sponsors and exhibitors is critical to the success of any event.
Onboarding can too often be a painful experience – encouraging them to complete their profile, add team members, upload necessary documentation as well as logging in to multiple systems.
It should be so much better. A great onboarding experience has a real impact on customer satisfaction and improves the ROI they get from exhibiting.
It can also be a massive timesaver for your team – getting them out of Excel and email hell.
Watch the video to see how ExpoPlatform’s Exhibitor Manual makes it easy to onboard and monetise exhibitors.
- Create customised exhibitor journeys
Easily create dynamic, interactive forms and multi-step pipelines to onboard exhibitors. Use the drag’n’drop editor to build unique flows for different exhibitors using conditional logic for custom journeys. - Set automated reminders and checklists
Allow exhibitors to add team members, upload key documentations, complete checklists and set deadlines with automated email reminders. - Generate new revenue
Monetise exhibitors by connecting them to trusted suppliers with ease through the webstore. Upsells and collect payment through invoices or credit card payment - A seamless, integrated experience
One seamless event experience from onboarding through to the event itself – no messy integrations or moving exhibitors between different systems and logins.
How exhibitors use the manual
Exhibitors can launch the manual from anywhere on the site, which is fully customisable to match your brand’s messaging and aesthetics.
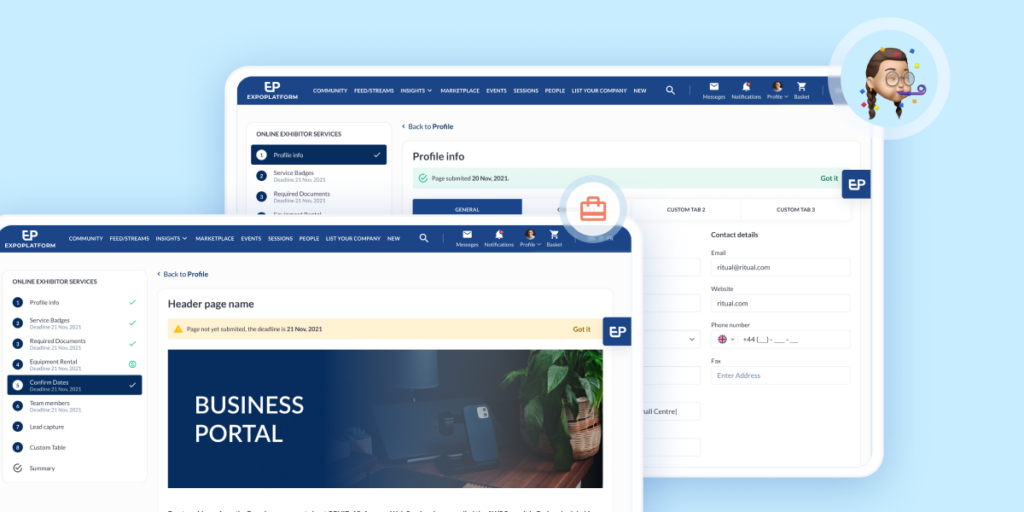
They are then met with a page which sets out the tasks and deadlines for your vendors to take on.
It allows exhibitors to onboard team members by simply typing in their email address. Documentation – such as health and safety guidelines – can also be uploaded.
The tool allows you to upsell exhibitors into a range of opportunities using multiple vendors, stand builders or digital packages.
Different tiers can easily be created which exhibitors can then add to their basket to checkout.
The payment process can either be done using a direct credit card transaction or through invoicing.
A summary page is then brought up which highlights all the actions your exhibitor has carried out – including filling out their profile, adding team members, documentation and more.
Backend setup
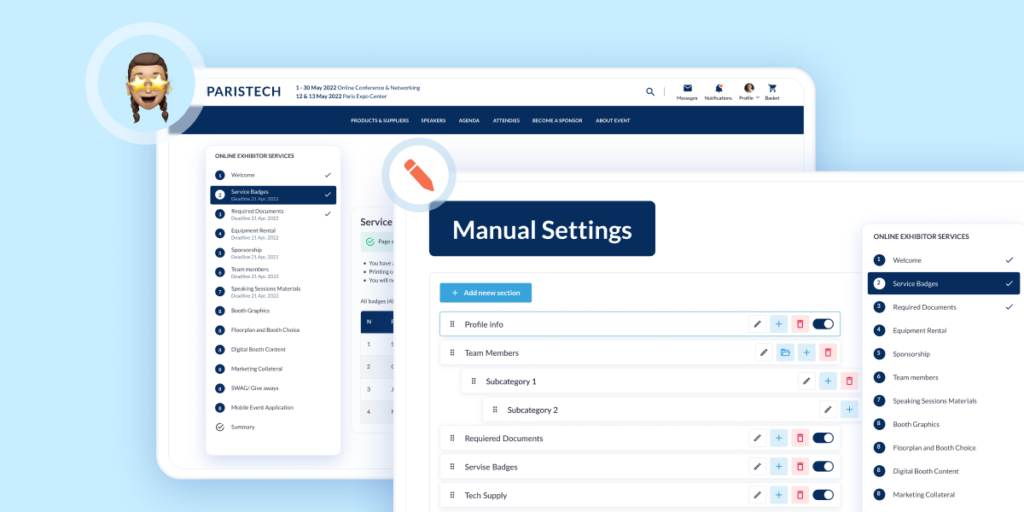
Your first step is to launch the exhibitor manual which brings up a page allowing you to create different sections using the drag’n’drop feature to move them.
Clicking into each section allows you to see the drag’n’drop editor to build your pages – easily adding any images or videos that you like.
Other elements which can be build in include check boxes, date fields or other types of information you want to be included for completion.
The tool allows you to set different conditions for who you want to be able to see these pages – for instance, higher-end exhibitors might be able to see more sections than others.
This section also allows for email setup to be carried out using the feature which can be triggered for sending at different stages.
Another drag’n’drop editor allows you to move different types of content to be included in the message -updating images, texts and format to suit your branding.
Finally, a user-friendly report is compiled showing the status of all your exhibitors.
It allows you to see all of them listed and what stage they are at. Filters can be used to show those who haven’t completed certain tasks.
We hope you enjoyed reading this article and found it useful. At ExpoPlatform, we want to help you build better events and communities. Please get in touch and ask for a demo here. Thank you.
There's more you might like

New partnership cemented for UK Construction Week
A new events partnership will see a major stone industry show being held along with UK Construction Week. The Stone Show & Hard Surfaces will co-locate with UK Construction Week in May. The Concrete Show will also unite with the UK Concrete Show, further consolidating the industry offerings. Read more about it below. Here are ...

Informa delivers 10% growth over five months
Informa has struck double digital growth in the first five months of 2024, reporting a 10% rise in revenue as it focuses on niche markets, unique content and global expansion. The company also maintained its full-year adjusted operating profit to reach the higher end of the £950 million (m) to £970m range. Read more about it ...

Exhibitions give £10.9bn boost to UK economy
Exhibitions generated £10.9 billion in business for the UK in 2023 – £1.5bn higher than last year – underscoring their crucial role in driving economic growth. These stats were revealed in the Event Industry Alliance’s (EIA) latest Economic Impact Study of exhibitions. Read more about it below. Here are the top headlines for your weekly ...
