
New Releases

We have introduced a series of new features to make your event free from any offensive content.
Organizers now have the ability to set up pre-defined guidelines and content submission requirements for Exhibitor Events.
Users can flag any inappropriate content and such exhibitor events can be reviewed by the organizer, who can reject them for security concerns.
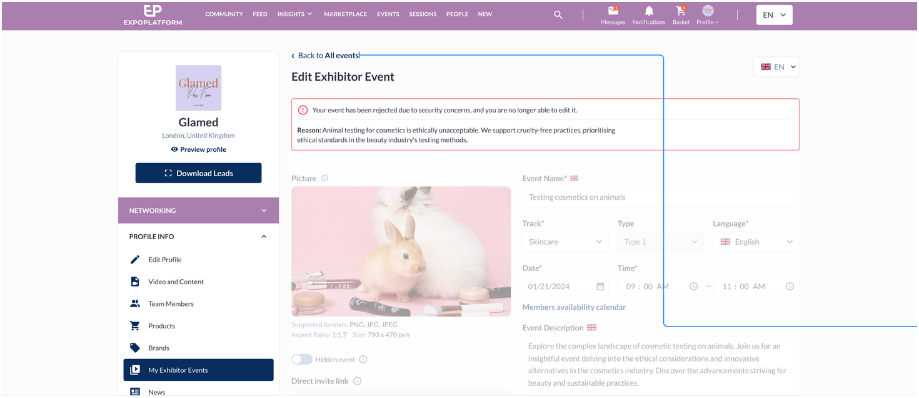
The exhibitor is notified of their event’s rejection along with the reason for the same.
This ensures policy compliance and content governance, making the show more transparent and secure.
Note: Exhibitor Events rejected for security concern cannot be appealed – this differs from those that are rejected for technical reasons or improper documentation.
Read below for the full details.
What’s included
1. New status for Exhibitor events – Rejected for Security concern
What is it?
A new status Rejected for Security Reasons has been added to the Exhibitor Event Status list.
The “Rejected for Security Concern” status duplicates the “Rejected” status, but exhibitors cannot resubmit changes to it. Therefore, this status cannot be changed and is final.
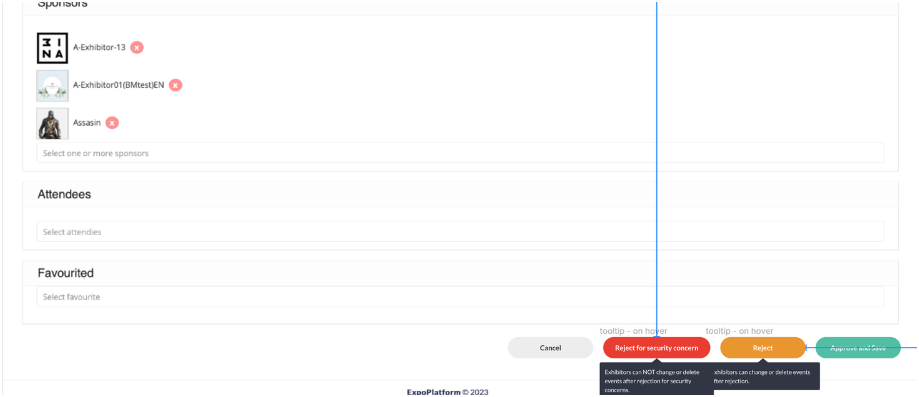
When marking an exhibitor event as rejected for security reasons, the organizer can also select the reason for rejection from a predefined list. This reason for rejection will be visible to the exhibitor on the front end of the event card.
Additionally, a new column Reported is added on the/admin/events page on the admin panel, which shows the count of users who have flagged rejection of the exhibitor events and when the organizer clicks on this number a details report gets opened.
Lastly, Exhibitors receive notifications informing them of the change in status to “Rejected for Security Concern.”
What are the benefits?
This will help organiser to report any inappropriate content added by exhibitor via exhibitor events
2. Users report offensive content in Exhibitor events
What is it?
A new setting added to Session Config tab that enables end-user reporting of offensive content added via Exhibitor Events
Allow Report Offensive Content – toggle determines whether users have the option to report offensive content directly on the front end for Exhibitor Events.

Predefined reasons settings: Allow Organizers to create, modify, or remove a list of preset reasons for marking an event as offensive content
Ask for Policy compliance: Organiser can add a compliance policy that exhibitor should agree to while submitting their event to the platform
Content Submission Policy: It opens a text box where the organiser can add the compliance policy for exhibitor events
Allow Exhibitors to see reports – If the toggle is enabled it allows Exhibitors to access the count of users who have reported their event. They get notified and can view the detailed report,
Default State: Off
What are the benefits?
Enables ability for the user also to report any offensive content added by exhibitors via exhibitor events
3. Users report offensive content in Exhibitor events: Email Template
What is it?
Email Template -> A new template is added to Session >> Email Template
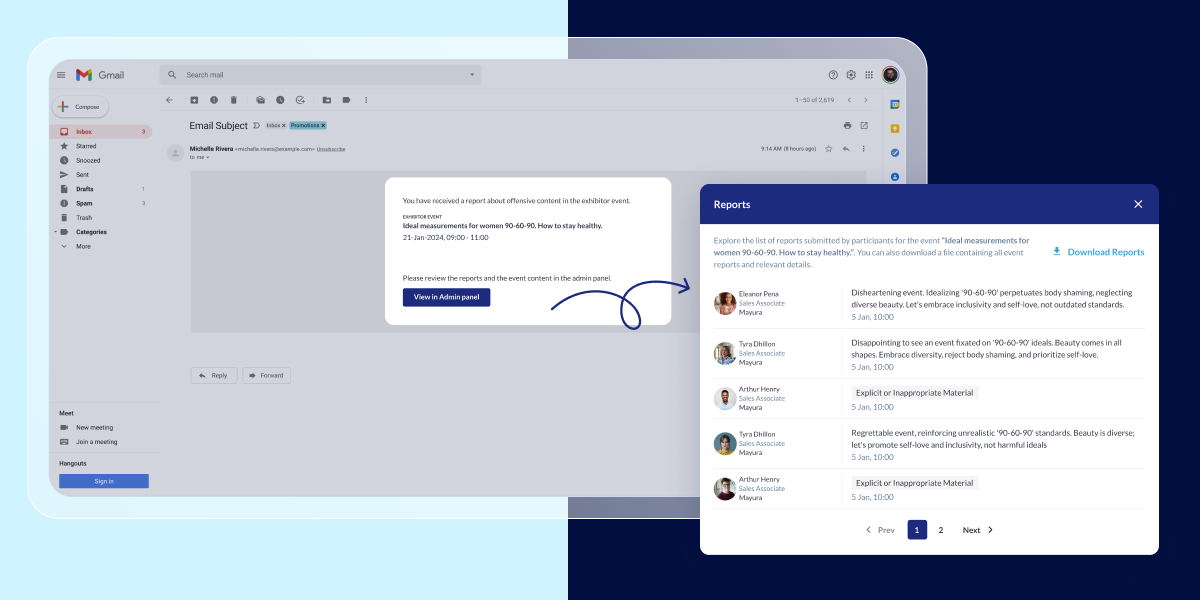
It notifies the organizer when the user reports any event.
This email template flies in every 15 minutes showing the details of all the users who have reported the event in those 15 minutes. If no report is submitted within 15 minutes, no email flies.
Flow of reviewing Report
When the organizer clicks on the link added to the email the organiser is prompted to log in to the admin panel and then redirected to the exhibitor event and a report detail pops up. The reported data can be downloaded in the xls file.
The report contains the following fields: Name, Job Title, Company Name, Reason for Report and Timestamp.
Once the organizer marks any event as Rejected for Security Concern, he can also enable a checkbox that will notify all the users who have reported the event about its rejection and can also mention the reason for rejection which will be visible to the exhibitor on My Event Page.
What are the benefits?
A detailed report is available on the Admin Panel, showing the details of users who have reported the event.
4. Improved Sessions report with security concern info
What is it?
Enhancement made to the Session export report where we have added 2 additional columns.
- Exhibitor event status – shows the status of the exhibitor event including new one Rejected for security concern
- Offensive content reports – This column will quantify the number of times a session has been reported for offensive content by users.

What are the benefits?
The Session Export report provides organizers with more comprehensive data on Exhibitor Events Status and the time the content is reported as offensive
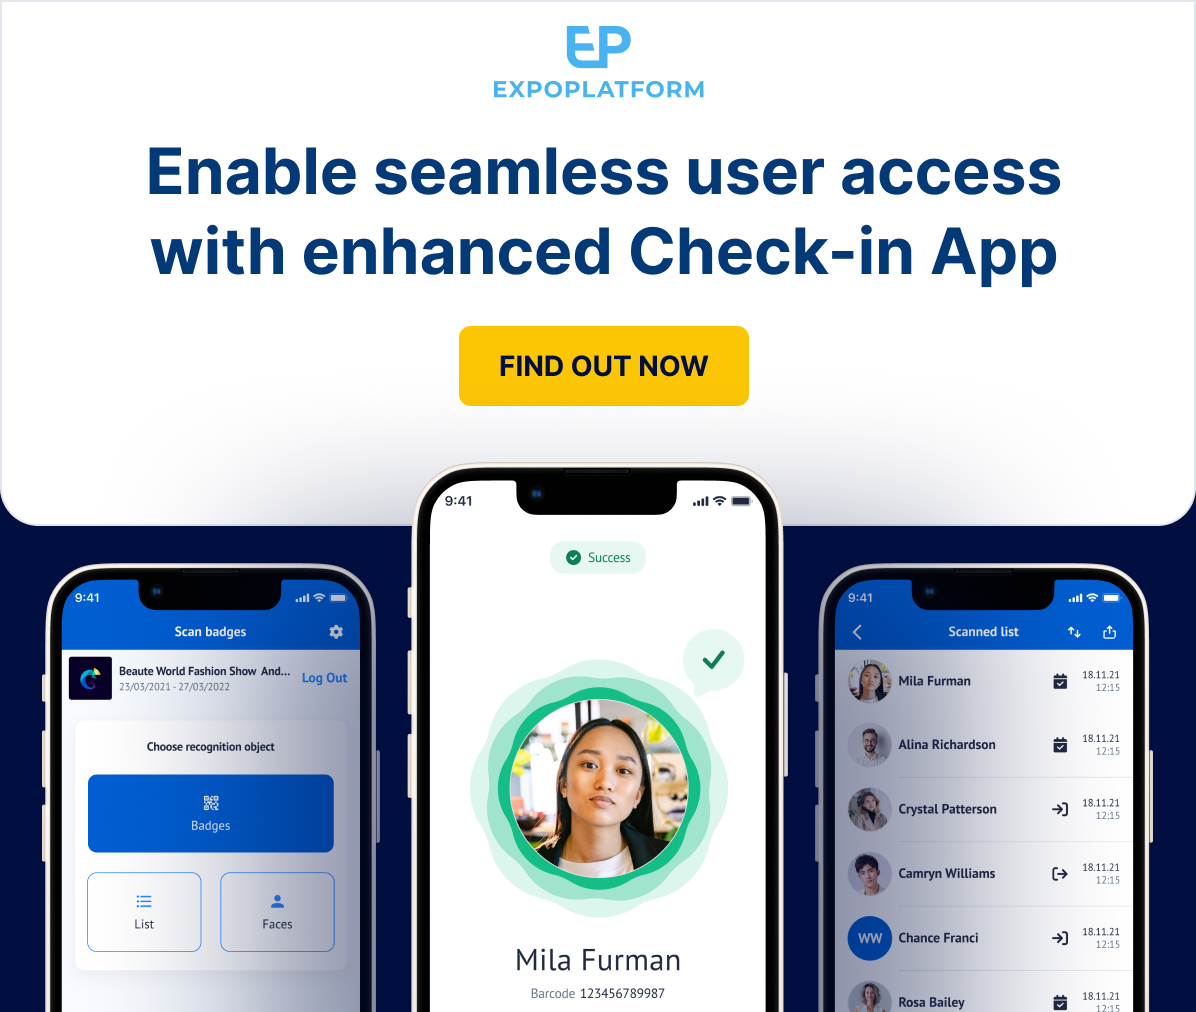
A seamless event check-in reduces complications for organizers and provides a more streamlined experience for attendees.
That’s why we have implemented a series of updates to our Check-In App to make it more user-friendly and intuitive.
These upgrades include:
- Simplified navigation for intuitive session check-ins
- Smart scanning functionality
- Design improvements for a better visual experience
- Updated app icon and enhanced interface
Read below for the full details.
What’s included
Simplified Navigation 🎯
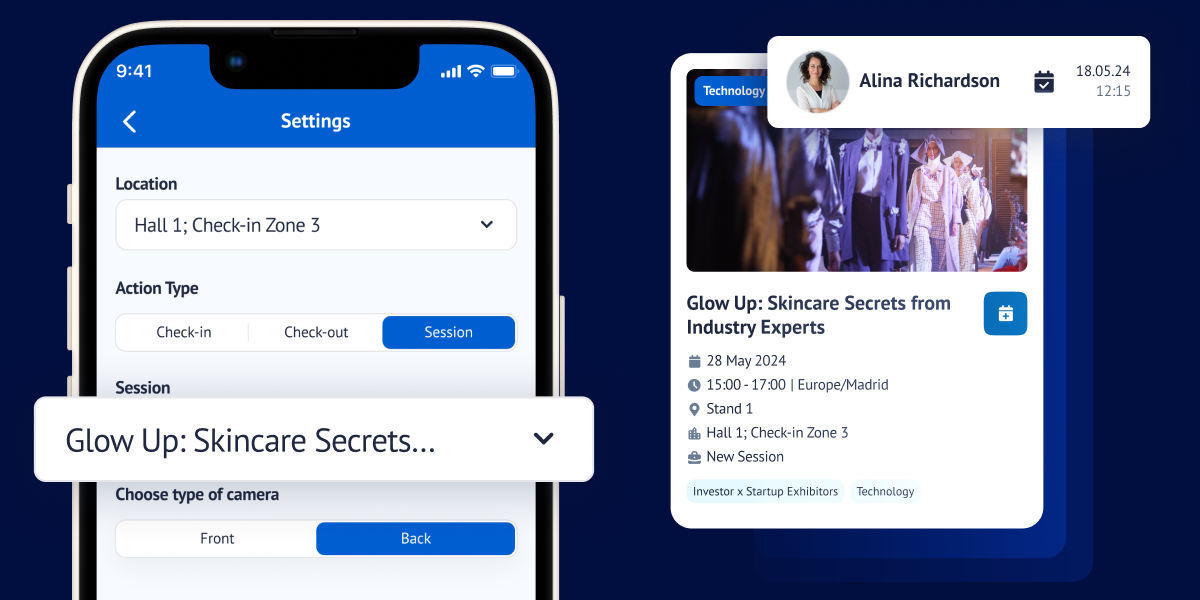
New settings screen: This streamlined screen allows you to easily manage your check-in options. Choose your check-in zone (halls, stands, or custom areas) and select your desired action (check-in, check-out, or session check-in).
Intuitive session check-in: For session check-in, a new selector displays only the sessions or events relevant to your chosen location. Simply pick the session you want to attend.
Enhanced Scanning 🤳

Improved accuracy: The app’s scanning logic has been refined to ensure precise data capture.
Clearer feedback: You’ll receive confirmation messages directly on the app, including a helpful notification if you’ve already scanned in for the same location that day.
Streamlined workflow: A one-second delay between scans prevents accidental duplicates and keeps the process moving smoothly.
Visually Appealing Design 📲
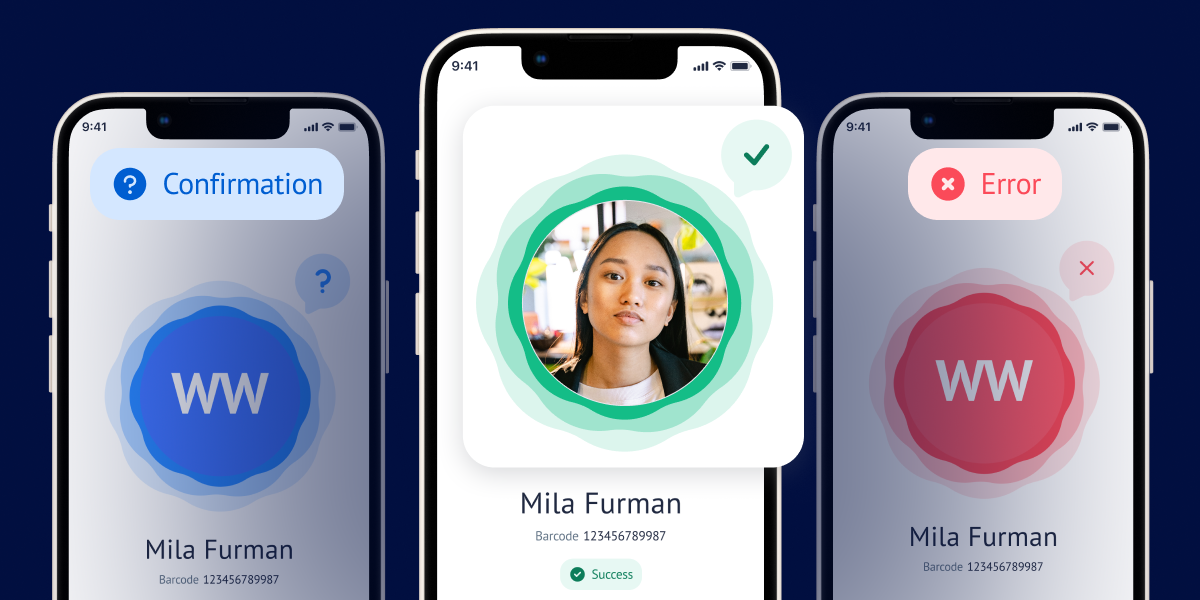
Fresh app icon: We’ve updated the app’s icon for a more modern look.
Enhanced interface: Enjoy a redesigned success/error screen and check-in list, making it easier to navigate and understand the information displayed.
What else is NEW?
Viewing Daily Schedule on Meeting Creation Page
What is it?
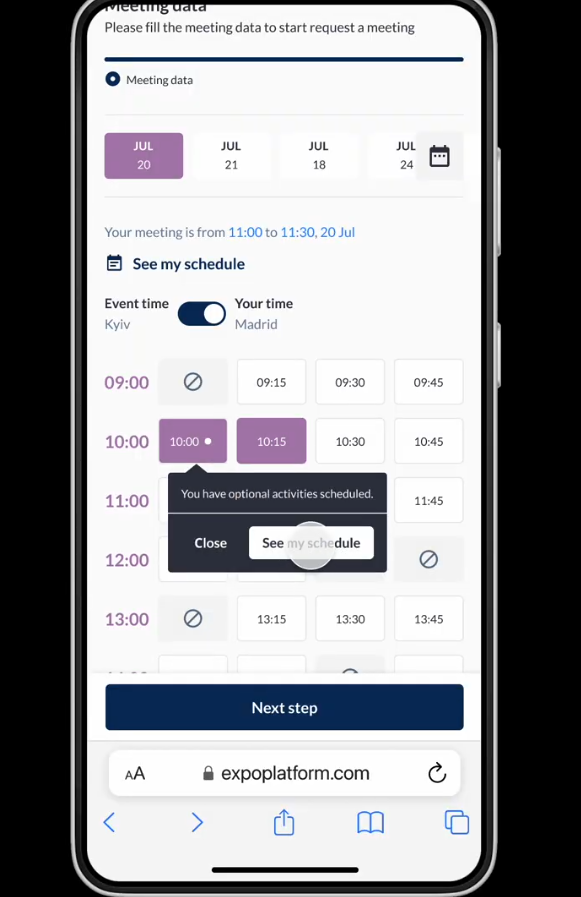
Tooltips added to the meeting creation page for user to view the reason why a time slot is unavailable in the time cell on the meeting creation page. The user can hover their cursor on the Not Available slot in the time cell to know the reason for the unavailability of the slot. Below are the reason for unavailability of the slots
- Location is not available.
- The organizer did not include the slot in the available dates and times.
- Other party is not available at this time
- User/TM already have a meeting booked at this time.
- User/TM is part of a session/ event at this time.
- User/TM has already booked a session/eh event at this time.
- User/TM has a blocked time
- Part of the selected time is unavailable for the meeting
- If User/TM has an optional activity booked at this time a dot appears on the time slot as soon as the user select the time slot
What are the benefits?
- This enhancement also informs the user about the reason for the unavailability of any time slot while scheduling a meeting.
Option to record timestamp for a specific field in the registration form
What is it?
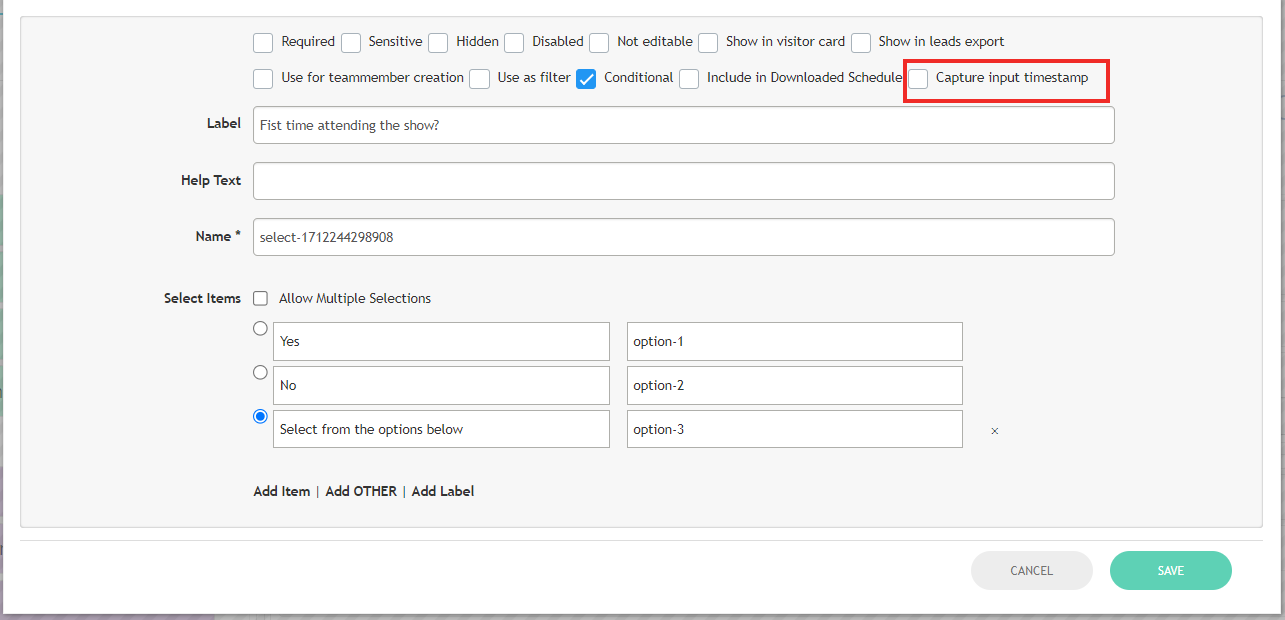
A new attribute is added to the registration pipeline field which when enabled records the timestamp when the data is inputted for that field by the user
Points to be Noted
- When the timestamp recording feature is activated for a field, the export report will include the corresponding timestamp for that field. The column name for the timestamp will be generated as “Timestamp” plus the name of the field for which the timestamp is enabled.
- The timestamp is captured in the format dd-mm-yy hh:mm:ss and reflects the local time zone of the event.
- When data is received through the registration form, the system captures the latest timestamp before the registration is completed.
What are the benefits?
- This improvement allows organiser to record timestamps for data entered into specific fields on the registration form.
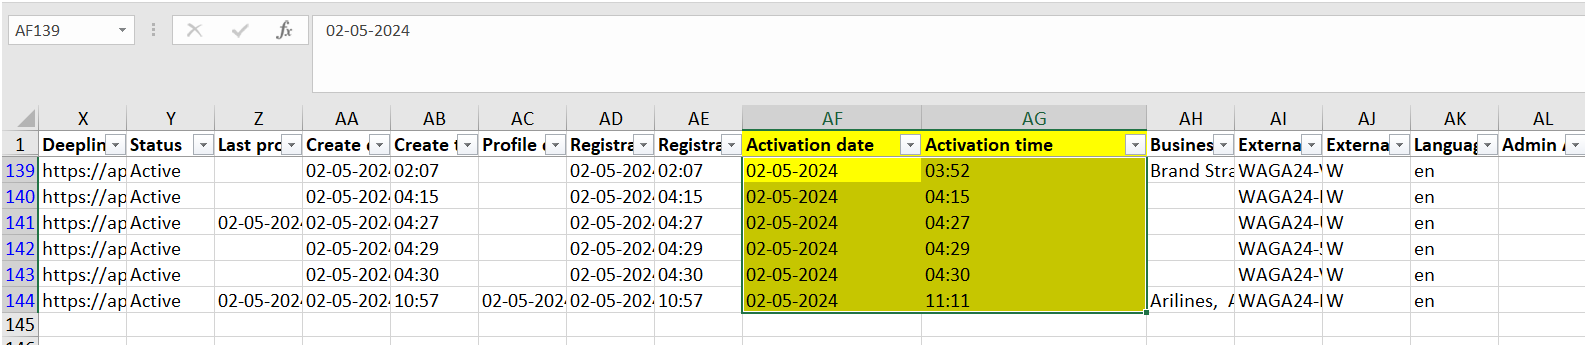
Add the timestamp of account activation in the Visitor exports
What is it?
Two new columns are included in the visitor export file that records the timestamp when the user has activated his profile. The account activation can be through activation link or by API call
The format in which the date and timestamp is available is dd-mm-yy & hh:mm:ss and reflects the local time zone of the event.
What are the benefits?
- Including this new field in the visitor export file provides organizers with details on when a user has activated their profile.
We have implemented a crucial update to help your end-users have a vastly improved event app experience.
Our In-App Update allows organizers to notify users of new app versions with bug fixes and enhanced features. Here are the highlights:
End-users can know that the new version of the app is available for them to update. The In-App Updates can be set as:
- Critical Update: Includes bug fixes and security of the app which is significantly affecting the working of the app and hindering the use of app. This app update will draw users attention to prioritize and promptly update their app for smooth app functioning and mitigating the negative user experience.
- Desired Updated: This In-App Update keeps the users informed about the general update done to the app so they can choose to update their app for a better user experience.
Benefits
Improves user experience by notifying them of the availability of a new app version, containing bug fixes and new features for enhanced functionality.
What else is NEW?
Changes made to the deadline date of any section of the Exhibitor Manual will not delete already collected data
What is it?
Enhancements have been implemented in the deadline date section of the exhibitor manual.
With these updates, data previously entered will remain preserved even if the organizer adjusts the deadline date for any section.
However, if modifications are made to any form, exhibitors must refill their details, even if they have already submitted them.
The modification to the date does not necessitate saving; the deadline date automatically updates upon selection from the calendar.
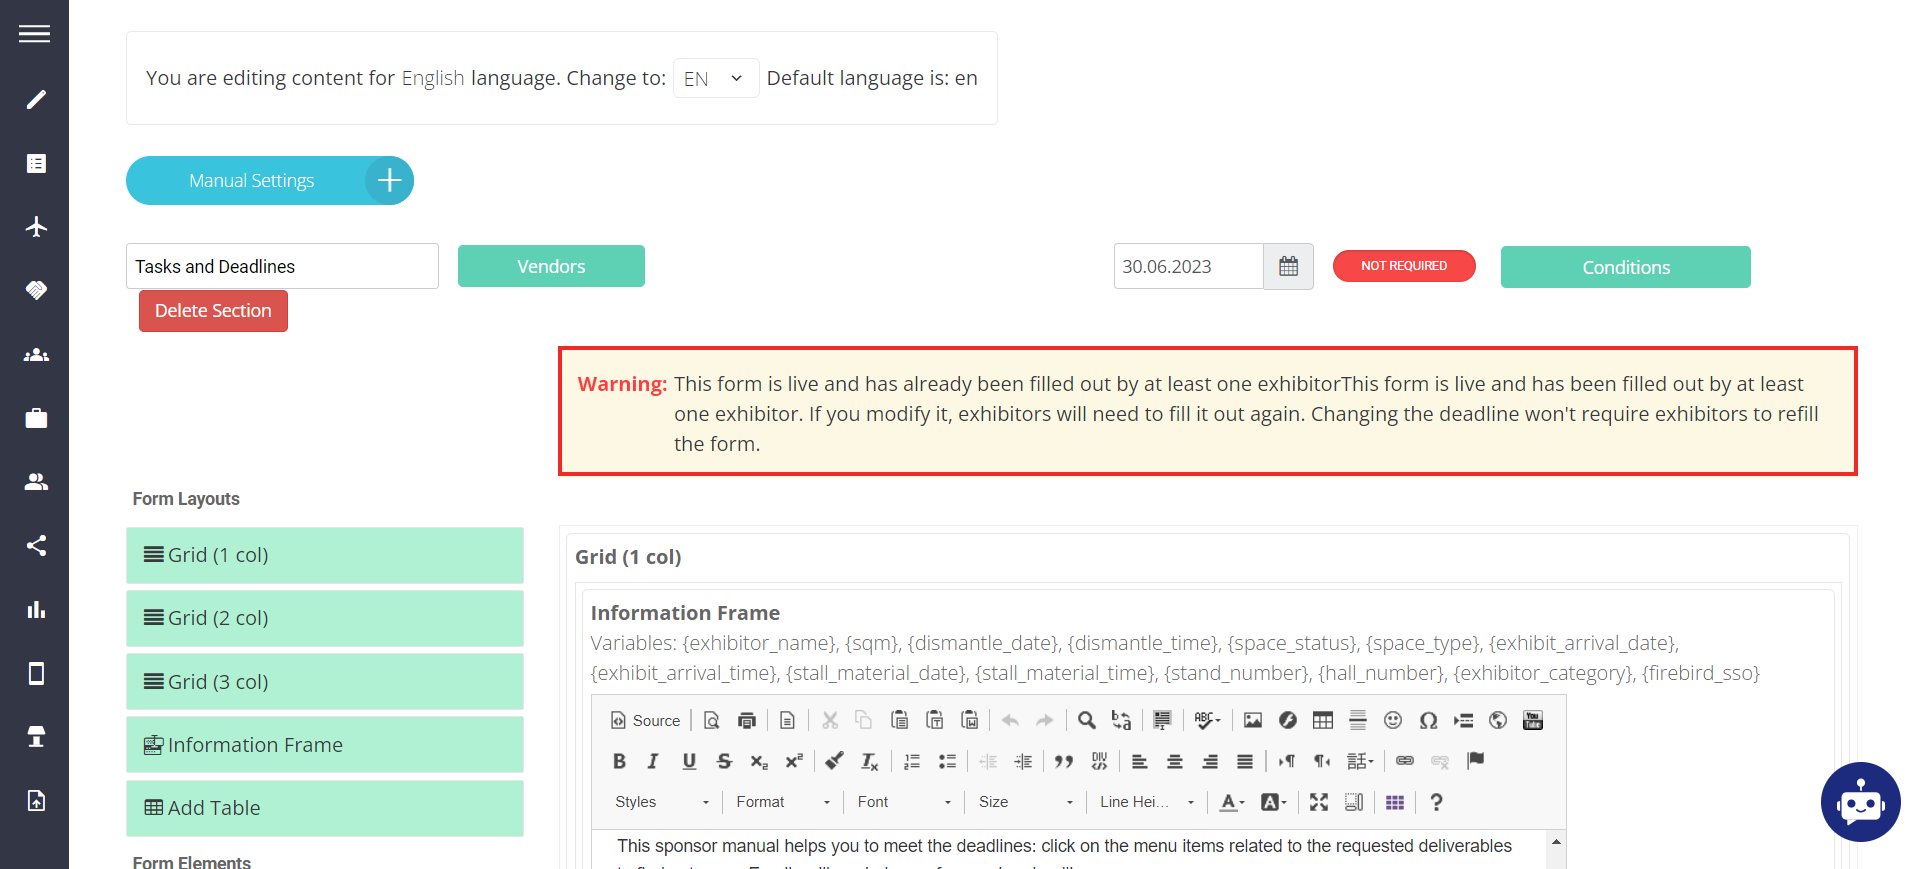
The system displays a warning message to alert the organizer when exhibitors need to update their details due to changes in the live form.
This form is live and has been filled out by at least one exhibitor. If you modify it, exhibitors will need to fill it out again. Changing the deadline won’t require exhibitors to refill the form.
What are the benefits?
Enables the retention of previously gathered data even when modifying the deadline date for any section.
Session speakers in Exhibitor events
What is it?
Enhancements have been implemented in the logic for adding Speakers and Moderators to Exhibitor Events, enabling all Speakers and Moderators linked with Sessions to serve as Speakers and Moderators for Exhibitor events, along with their team members.
Admin Panel Settings: A new settings Sessions Speakers/Moderators available for Events” added under Session Configuration →Exhibitor Event Column
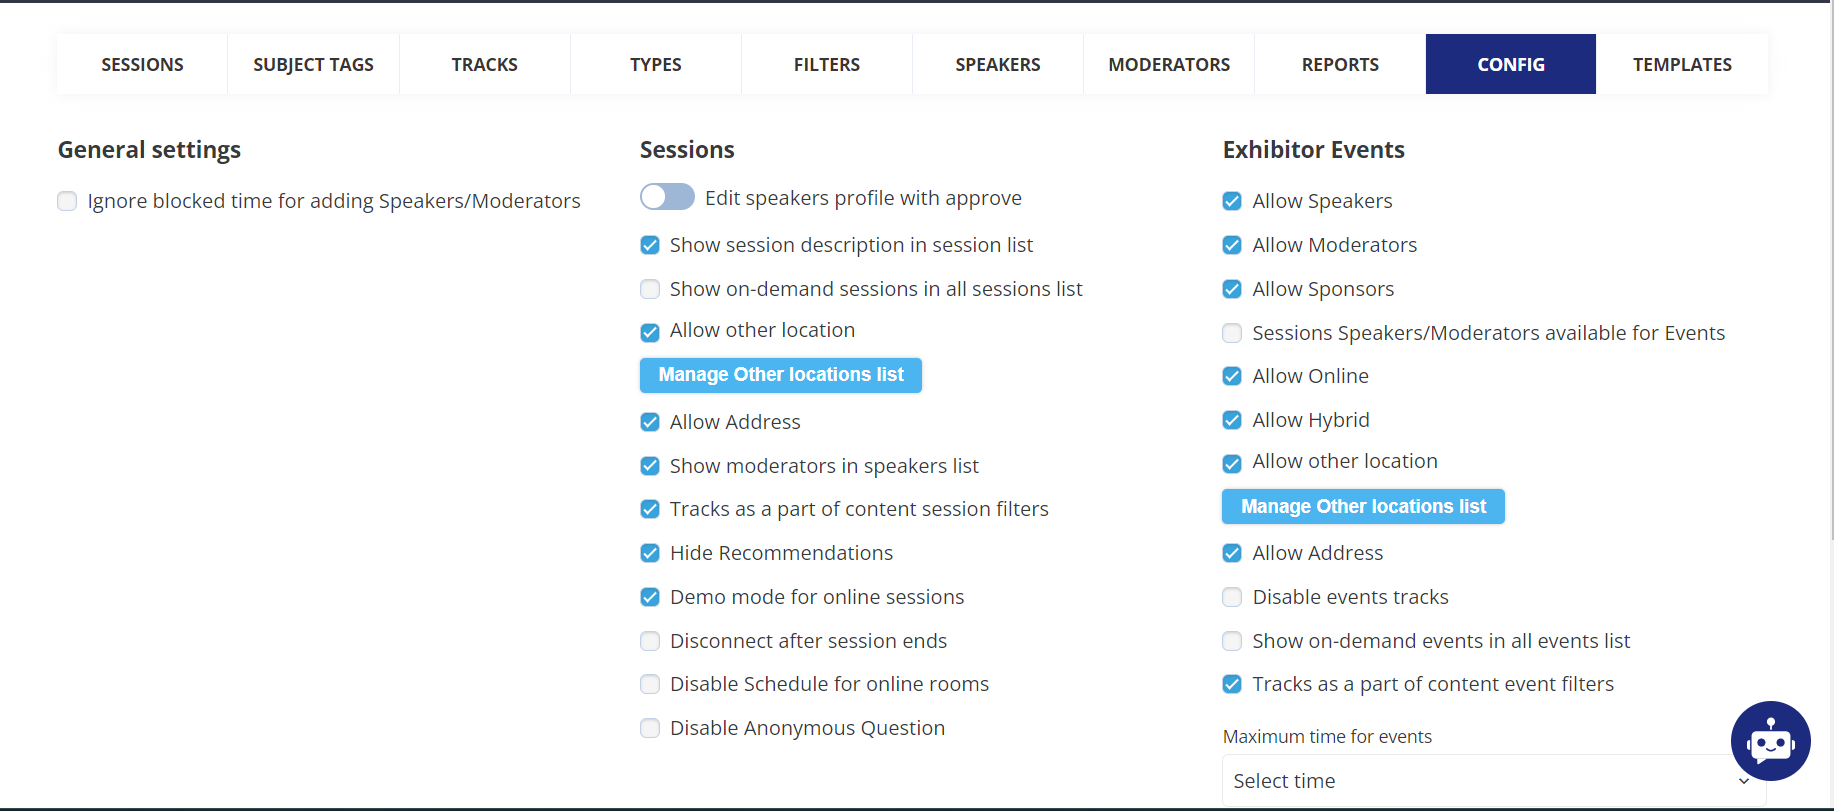
Default State: Off
What are the benefits?
Capability to designate session speakers and moderators as speakers and moderators for exhibitor events.
My/Team schedule drawer in the meeting request page
What is it?
A new setting is enabled on the meeting creating page both Web/App which allows the user to view their schedule while scheduling a meeting with another user.
The option to view My schedule on the meeting creation page is only available on the New Meeting Flow. This allows users to refer to their existing meetings and availability while booking a new meeting.
When a user clicks on My Schedule, a pop-up shows the schedule for the date selected on the meeting request form.
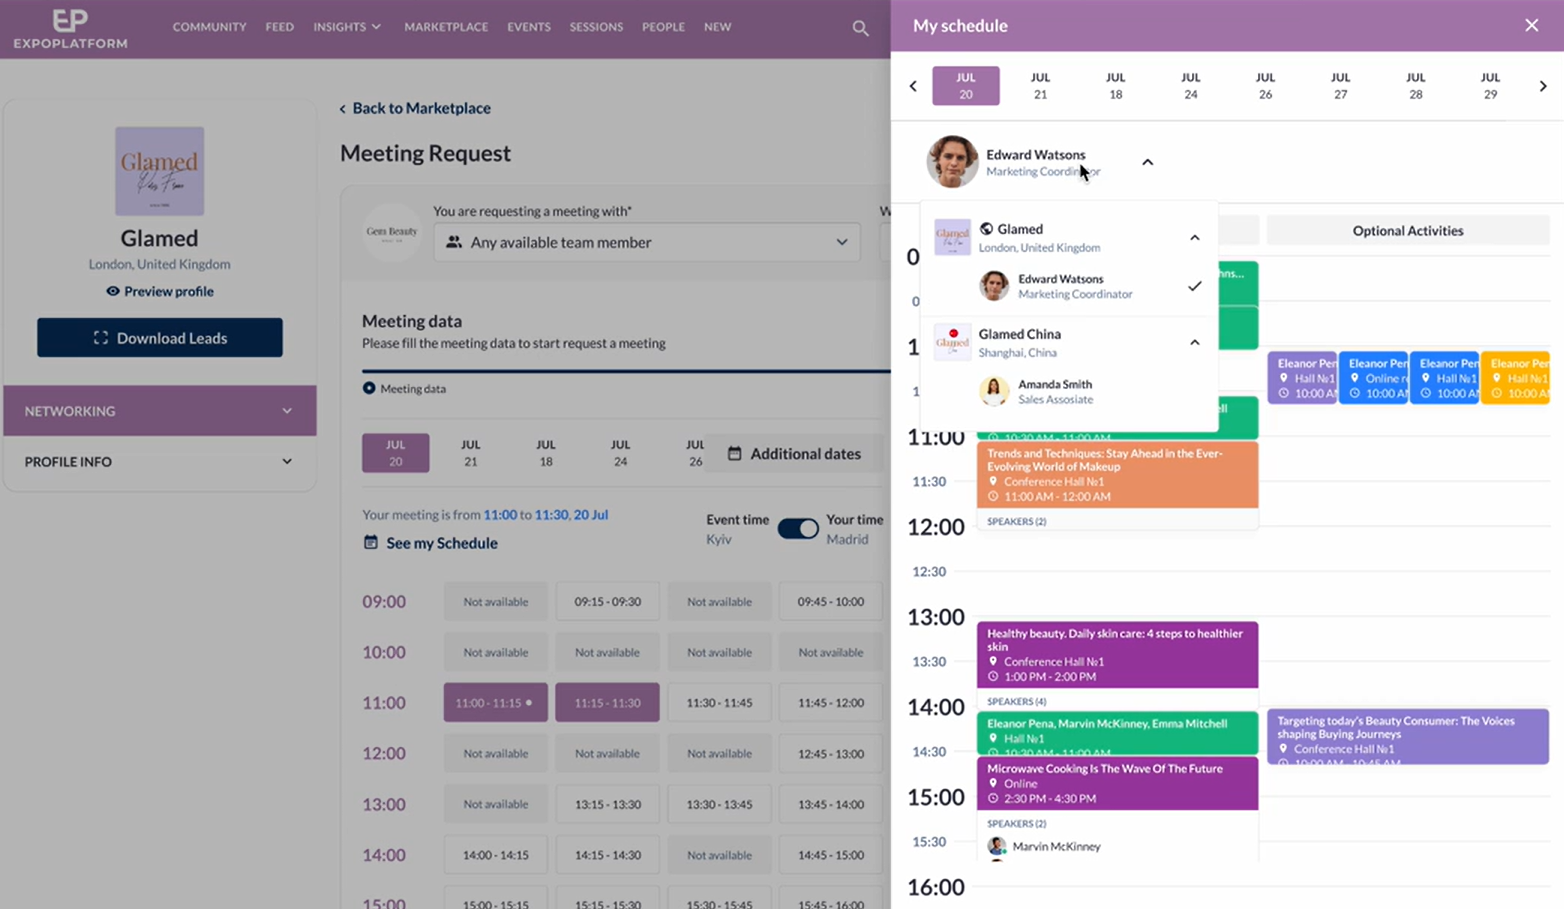
The pop-up consists of Date selector, Team member selector (Exhibitor with TM) and schedule grid in calendar view.
Record cards in the scheduling pop-up are active they are clickable and show the details of the session when clicked.
What are the benefits?
Users have flexibility to review their schedule and availability before scheduling a meeting, enabling them to plan their meetings more effectively.
Rename Sponsor Block on App
What is it?
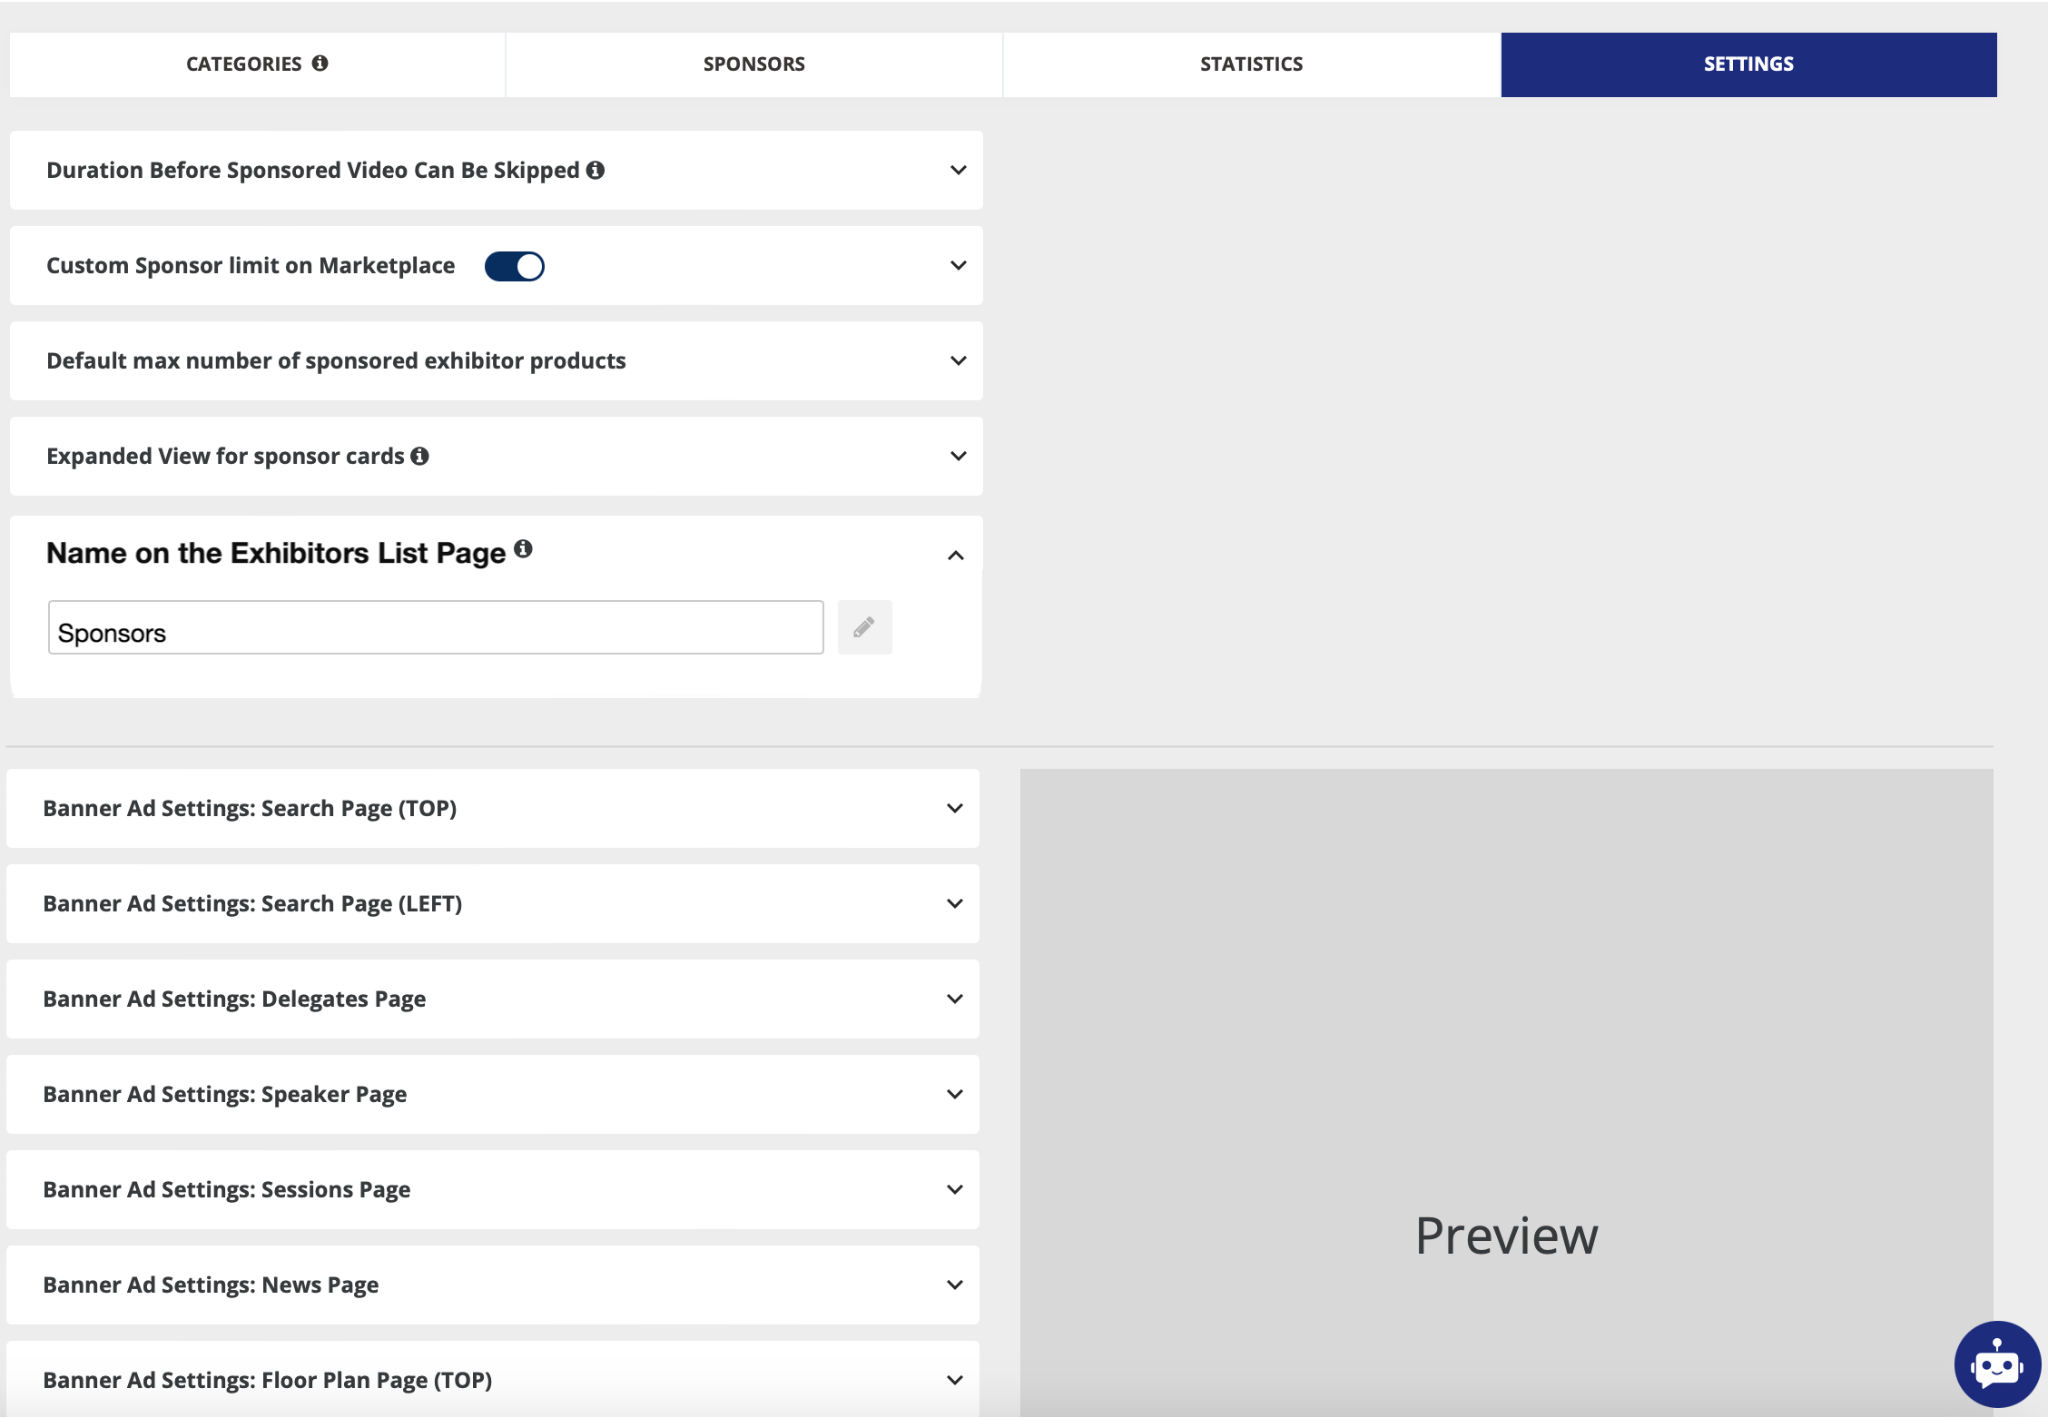
A new setting called “Name on the Exhibitors List Page” and “Name on the Products List Page” has been introduced on the Sponsor Settings page (/sponsors/settings). This feature enables organizers to customize the name displayed for sponsored exhibitors and sponsored products on both the app and web platforms, on the exhibitor list page.
The sponsor block name can contain a maximum of 60 characters.
Note: Customizations on Sponsor’s and Sponsored products’ names are also possible by using CSS code in both app or Web. This customisation is allowed for increasing font size, colour, type etc
What are the benefits?
Flexibility for the organizer to rename the sponsor block as per the event requirement.